Super Beetle
3. Installing the Wings and Header
From here on out, every cut counts. It is very hard to recover from mistakes, and even if others do not notice, you know that flaw is there. Take your time, each piece took me about 40 minutes to 1 hour to install.
You will be using the DAP Weldwood contact cement to cement this in. The fumes are very strong, so vent your workspace. I also used a 2 inch brush to apply the glue to both the back of the carpet and the body itself. Each piece requires about 20 minutes to tack. Don’t worry, you will have plenty of time to put down, mold, pull up, put down again (and again and again). Let each piece dry for another 40 minutes, but in the way that I install these, you will not be standing on a freshly glued piece. I used 1 gallon of DAP on this project.
Let’s take a look at the TMI carpet kit:
- Cost Front 9pc $78 / part#34-F1214-607
- Cost Rear 5pc $60 / part#34-R1103-607
- No pre-cut holes
- Need Strong Adhesive
- Need Very Sharp Scissors
- Padding does not hurt, they sell the kits
- Is over length in many pieces, so more cutting is required
- Looks like it will not fit, at first
Okay, let’s move onto installing the carpet.
1. Preparation
You’re going to need some space, a sharp pair of scissors, a sharp utility knife, a Sharpie marker and strong contact cement. Make sure the area has proper ventilation, less you want to ride the dragon during the procedure. If not, move the family and neighbors out and use a respirator.
I used DAP Weldwood in the Red can (original formula). I tried the DAP in the Green can while installing the headliner and was less then satisfied with it’s bonding ability. The Red stuff is really thick and tacks in 15-20 minutes, pending your weather. That’s perfect for what we are doing here.
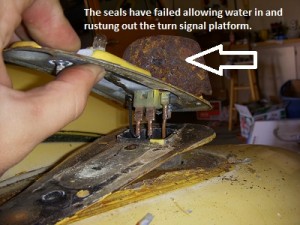
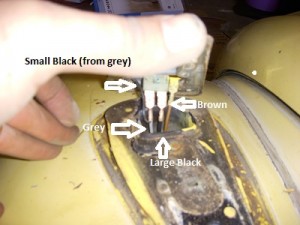
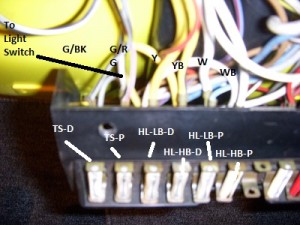
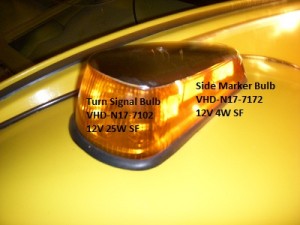
Turning our attention to the top of the fenders, there are two more lights under the tear shaped canopy. As you can see on mine, the seals over that canopy failed, causing the turn signal platform to rust out, which was no good. Replace as necessary, Mexican is fine here. Those wires route in on the front harness like the headlights into fuse locations 1 & 2.
| Light | Fuse Position | Wire Color | Bulb |
|---|---|---|---|
| Driver’s side Turn Signal | 1 | Grey | VHD-N17-710212V 25W SF |
| Passenger side Turn Signal | 2 | Grey / Black | VHD-N17-710212V 25W SF |
| Driver’s side marker | 1 | Grey / Red | VHD-N17-717212V 4W SF |
| Passenger side marker | 2 | Grey / Black | VHD-N17-717212V 4W SF |


