The VW Beetle uses Halogen headlights with incandesant bulbs for the rest. Each light has either a separate wire or one that is joined at the connector. A good example of the latter is the triple connection resting on the driver’s side front wheel well under the hood. All of these connections are doubled up at the connectors to facilitate the twin brake switches located on the master cylinder. Let’s start by taking a look at the headlights:

1. Headlights
Yeah, you need these working to pass DMV in California, both lows and brights. The Beetle that I bought had 1 Sylvania and 1 Phillips installed, so that was neato. I will be working from the headlights back to the fuse box. These lights are 7 inch Halogens, used by VW on most of their models until the late ’80s, as I can interchange them with both my Bus and Rabbit. They have three prongs located at the rear of the sealed unit; one on top and two on each side. Looking at the front of the plug , Clockwise, White (Passenger side) /Yellow (top) / Brown (Driver’s side).


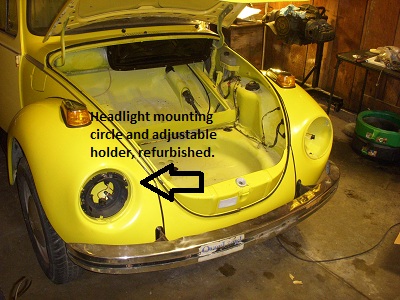
How do the lights mount onto the body? They do so with two circles and a retaining ring. First there is a mounting circle (you can see the three mount points for these in the hull). An Adjuster Ring is mounted onto of this, which has two mount points and a spring (located at the bottom of the assembly). The Headlight mounts to the Adjuster Circle via long screws, using the tabs on the sides of the light units.

Next, install the sealed beam unit to the Headlight Adjuster Circle using the long screws.

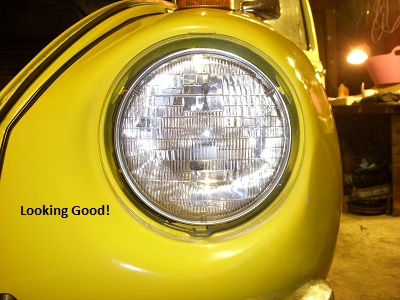
Here is a view with both sealed units installed:

Now install the retaining rings over the edges of the headlights.
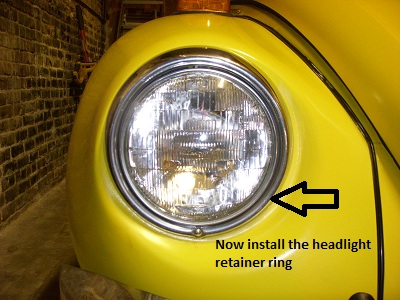

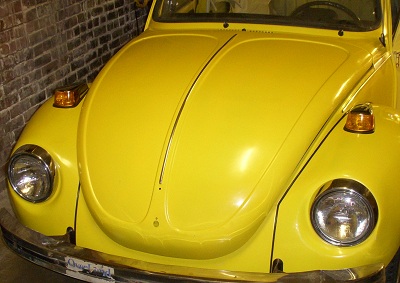
Headlights installation complete.
The wires for these travel from the front of the fender into the side of the luggage compartment via rubber tubes. The ones I bought, I broke initially because the sharp edges of the connectors torn into the sides. They are cheap and I figure you need at least three to do the job. Start by wrapping the connectors with electrical tape, trying to not bunch them all up at the top (I know, it’s difficult). Now get out some wheel bearing grease and grease the hell out of the wires and the tube. This will help when you’re stuck halfway into the tube and are about ready to give up. Push the wires through using a blunt rod; I used the jack handle that came with my Rabbit’s stock jack. The tubes might be too long for the travel distance between the fender and the body, which was my case, but there does not seem to be any shorter ones available. Another 1973 issue I guess.

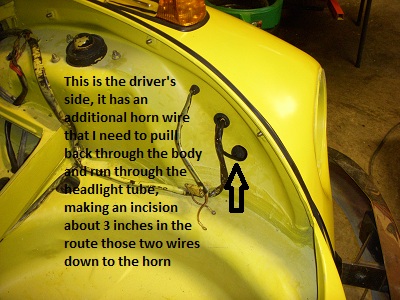
On the driver’s side, even more difficulty is added by having to make an incision in the tub about 2-3 inches from the body to push the horn wires through. Seems kind of dumb to cut a hole into the tube for weather-proof reasons, so try to do it at the top (I guess). You can see in my picture that I got lazy and ran it out what used to be my air conditioner hole.
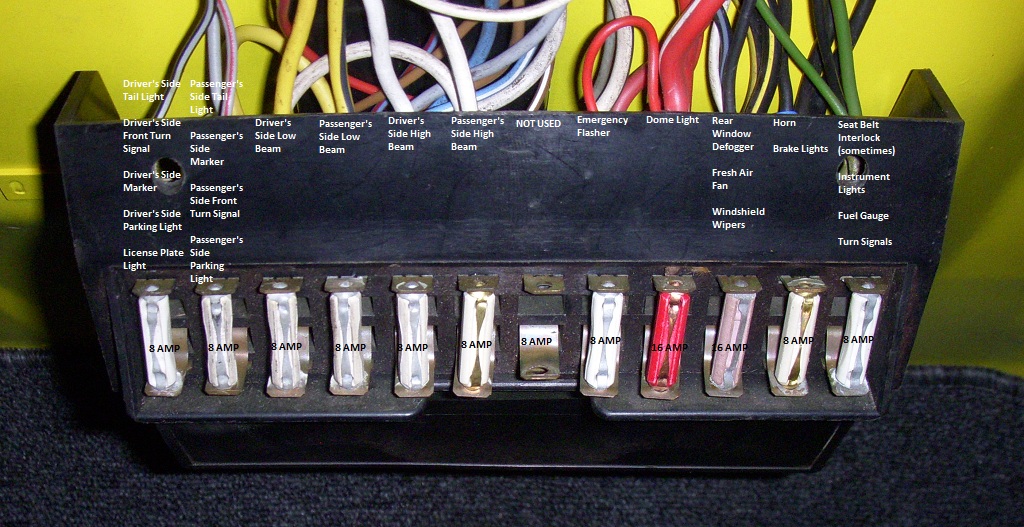
The wires route up the driver’s side wheel well and through the firewall at a hard to access hole near the driver’s knees. This is the front wiring harness (one of three). They attach to the fusebox as follows:
| Headlight | Fuse Positions | Wire Color |
|---|---|---|
| Driver’s side Low Beam | 3 | Yellow |
| Passenger side Low Beam | 4 | Yellow / Black |
| Driver’s side High Beam | 5 | White |
| Passenger side High Beam | 6 | White / Black |
Leave a Reply
You must be logged in to post a comment.