Scott Schneider
Front Wiring Harness
The front wiring harness is fairly easy to interchange, and many parts suppliers provide fronts for many years of Beetle, minus the 1973 Super Beetle, of course. I chose to remove the harness when painting the body, then re-installed it afterwords. Someone painted over the harness in the past, so I know exactly where it clamped prior to restoration.
Electrical
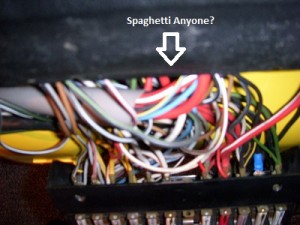
 Lets focus on the electrical system. The system consists of three wiring harnesses, a test connector (sometimes), the fusebox (with 2 relays), and the battery. Many folks seem skip this part, as I have seen many Beetles out there that I would name “Old Spark”. On these old cars, the wires get stiff and crack the insulation over time. Connectors rust out or detach from the wires easily, causing you to crimp new ones on. Good luck finding the micro size connectors, BTW. This requires some patience because you have a mess of wires that bunch up under the dash and into the fusebox. Let’s dive in…
6. Installing the Center Piece and Floor Pieces
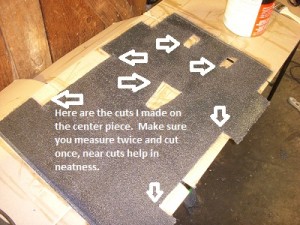
 Next we install the center piece. We will also cover seat release mechanisms, although I recommend doing that after the glue has dried overnight. This piece requires critical cuts around the handbrake and seat release levers. Fit the piece so that the rail is lined up on the driver’s side. Take your Sharpie and mark a dot in the middle and ends of the handbrake area as best as you can. Cut a slit along those three dots and re-fit the carpet, cutting out a small trapezoid (wide end towards the rear) where the handbrake is. Keep fitting and refitting the carpet making the cuts as smalls as possible. Once you have it, line it up on the passenger side seat rail and measure the distance between the rails to see how this will lay.
Now, find the top of the seat release control box on each side of the hump and mark the corner with your Sharpie. Cut those out a little at a time, staring with a slit and slowly opening that into a box. Overlap the top and bottom a little so the cup will bite onto the carpet and look clean. This is difficult, so take your time.
