6. Installing the Center Piece and Floor Pieces
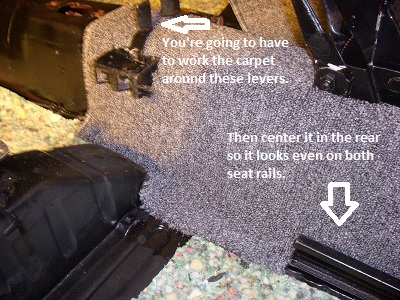
 Next we install the center piece. We will also cover seat release mechanisms, although I recommend doing that after the glue has dried overnight. This piece requires critical cuts around the handbrake and seat release levers. Fit the piece so that the rail is lined up on the driver’s side. Take your Sharpie and mark a dot in the middle and ends of the handbrake area as best as you can. Cut a slit along those three dots and re-fit the carpet, cutting out a small trapezoid (wide end towards the rear) where the handbrake is. Keep fitting and refitting the carpet making the cuts as smalls as possible. Once you have it, line it up on the passenger side seat rail and measure the distance between the rails to see how this will lay.
Now, find the top of the seat release control box on each side of the hump and mark the corner with your Sharpie. Cut those out a little at a time, staring with a slit and slowly opening that into a box. Overlap the top and bottom a little so the cup will bite onto the carpet and look clean. This is difficult, so take your time.
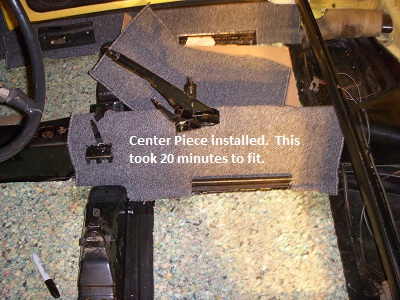
Once satisfied, glue it in. Get the front over the seat release levers first, then over the handbrake. Line up the front and the back using the front line and back lines along with both seat rails. I cut slits again on the ends of the rails to ensure a good fit.
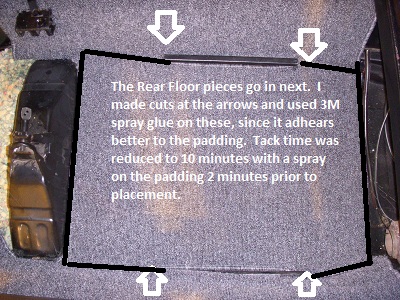
Moving on, I installed both of the floor pieces using 3M spray glue because the DAP does not adhere to the padding too well. I found out later to not apply DAP to the padding, but only to the carpet works fine also. I made slits on each seat rail and lined it up with the seat pillar. Repeat on passenger side.
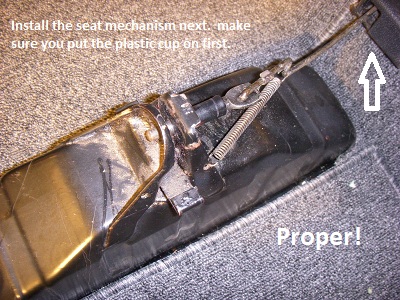
Installing the Seat Rail Mechanism is easier by looking at the picture below. The short loop of the spring goes into the pillar hole and the long end onto the push-rod. Make sure you put the plastic box-cup on before hooking all that up or you will be doing it all again.
7. Installing the Main Piece
The main piece is the largest in the kit, with the rubber foot rest on the driver’s side. It requires cuts to get it around the pedal area, a lot of cuts! Fit it, cut small, fit it again. Make sure you have freed the accelerator cable, as the kit will cover that area up if left unattended. I also cut the hump area out a little for better fitting.
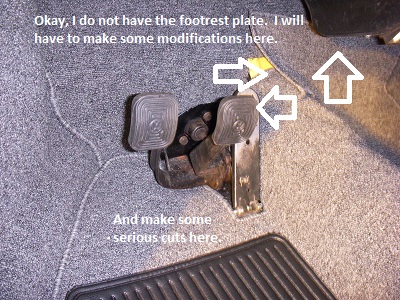
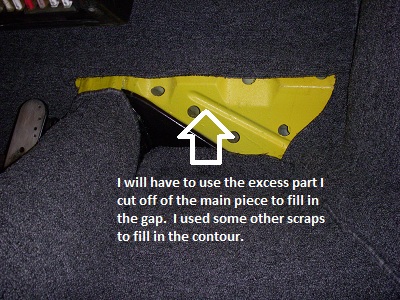
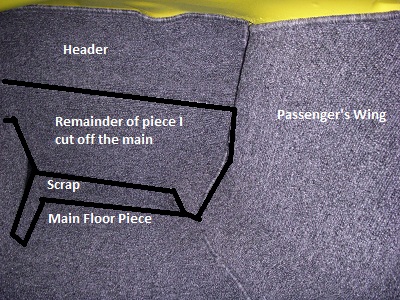
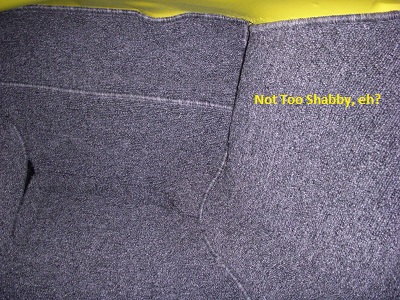
Since I did not have the passenger footrest plate, I had to make yet more cuts to modify the excess passenger side carpet to fit flat onto the floor. I used the excess to fill in the gap between Big Bertha and the header, which was not enough and had to use another piece.
Apply glue to the bare body parts and overlapped carpet areas. Do not apply glue to padding, it is just folly. Tack and press. Line it up well over the hump and make sure the sides are tucked in tightly.
Done? Done! Let all that dry then go back to do the accessories. I have not cut my gear shifter in yet, but just cut the hole with a utility knife, and all should be good to go.
Leave a Reply
You must be logged in to post a comment.