Minor Harnesses
Okay, I lied, there are more then the “main three” harnesses. These “minor harnesses” include the Starter Harness, Backup Light Harness, Test Connector Harness (we’ll cover this in it’s own section), Battery Harness, Fuel Gauge Harness, Fan Motor Harness and Wiper Harness.
Starter Harness
The Starter Harness runs from under the rear seat, routes out right above fuel line and into the Engine Compartment. It consists of two wires, which break out like this:
| Wire Color | Function | Harness Side | Fusebox / Dash Side |
|---|---|---|---|
| Large Red | Starter Start | Starter | Single Connector Rear Seat |
| Red / Black |
Backup Light Harness
The Backup Light Harness runs from the transmission, routes through an hole on the Passenger’s side of the Engine Compartment, then attaches to the three-way connector also in the Passenger’s Side Engine Compartment. Sometimes, this is routed behind the tar board back there. It consists of one wire, again, which breaks out like this:
| Wire Color | Function | Harness Side | Fusebox / Dash Side |
|---|---|---|---|
| Black | Reverse Light Activation | Reverse Light Switch on Transmission | Triple Connector – Passenger’s Side Engine Compartment |
Battery Harness
The Battery Harness consists of two wires and runs from the Battery Positive Terminal in two directions. One direction leads out the rear pan area on the Passenger’s Side, then to the Starter. The other direction routes under the back seat, over the hump and onto the Voltage Regulator (B+). The rear seat hold-down bar that straddles the car has a channel to route this properly.
| Wire Color | Function | Harness Side | Fusebox / Dash Side |
|---|---|---|---|
| Black | Starter Power | Starter (30) | Battery (+) |
| Red / White | Starter Start | Voltage Regulator (B+) | Battery (+) |
Fuel Gauge Harness
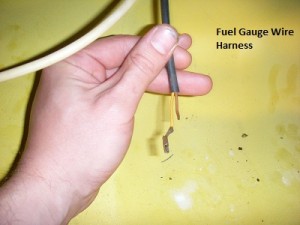
The Fuel Gauge Harness is hidden behind the dash. It routes from the cabin, through the firewall under the fresh air box, and onto the Fuel Tank where the Fuel Level Sender lives. The harness also has two wires, which break out like this:
| Wire Color | Function | Harness Side | Fusebox / Dash Side |
|---|---|---|---|
| Yellow | Fuel Sender | Fuel Sender | Fuel Gauge (Speedo) |
| Brown | Fuel Sender | Fuel Sender | Ground to Firewall |
Fan Motor Harness
The Fan Motor Harness is also buried behind the dash. It consists of three wires which run from the Fan Switch mounted on the lower part of the dash, route out the firewall into the fresh air box, attaching to the fan motor itself. Here is how that breaks out:
| Wire Color | Function | Harness Side | Fusebox / Dash Side |
|---|---|---|---|
| Black / Red | Fan Motor Low | Fan Motor (33f) | Fan Switch (33f) |
| Black / Yellow | Fan Motor High | Fan Motor (33b) | Fan Switch (33b) |
| Brown | Fan Motor Ground | Fan Motor | Ground to Firewall |
Wiper Harness
The Wiper Harness again is buried behind the dash and consists of five wires. It runs from the Wiper Switch mounted on the steering column, routes out the firewall into the fresh air box, attaching to the Wiper Motor itself. Here is how that breaks out:
| Wire Color | Function | Harness Side | Fusebox / Dash Side |
|---|---|---|---|
| Black | Wipers | Wiper Motor (53) | Wiper Switch (53) |
| Black / Yellow | Wipers | Wiper Motor (53b) | Wiper Switch (53b) |
| Green | Wipers | Wiper Motor (53e) | Wiper Switch (53e) |
| Black / Grey | Wipers | Wiper Motor (53a) | Wiper Switch (53a) |
| Brown | Wiper Ground | Wiper Motor | Ground to Firewall |
The Test Connector
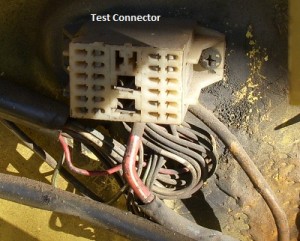
The test connector was used by the VW Dealer to help diagnose your Beetle. I highly doubt there is a VW Dealer these days that still has the equipment to utilize the test connector jack, but I might stand corrected. The test connector has one large Red / White wire and a normal Brown, then a bunch of mini connectors that lock into a plastic receptor. This receptor is then mounted on the upper rear firewall on the driver’s side. Here is how that breaks out:
| Wire Color | Test Connector Terminal | Where It Goes |
|---|---|---|
| Large Brown | 31 | Ground to Driver’s Side Engine Bay |
| Large Red / White | + | |
| Blue / White | 5 | Defog Relay (87) |
| Grey | 6 | Voltage Regulator (D+) |
| Brown | 8 | Battery (-) |
| Red | 9 | Fusebox #1 (Grey / Black after Connections) |
| Black / White | 10 | Emergency Flasher (L) |
| Black / Green | 11 | Emergency Flasher (R) |
| Black /Red | 12 | Brake Switch (81) |
| Grey / Green | 13 | Generator (1) |
| Brown / White | 17 | Battery (-) |
| Green | 19 | Ignition Timing Sensor |
| Green | 20 | Ignition Timing Sensor |
Grounds
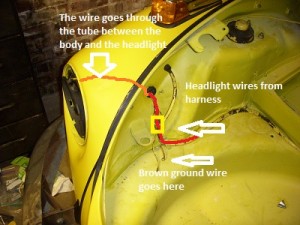
Now let’s look at the Brown Ground wires. There are two areas in the front trunk area where screws hold down both the headlight and turn signal ground wires, on either side.
In the Cabin, there are two more areas to ground wires to, the firewall behind the dash (near the drivers right knee) and the Speedometer. Here is how that breaks out:
| What | Where It Is Grounded |
|---|---|
| Wiper Motor | Firewall |
| Fan Motor | Firewall |
| Fuel Tank Sender | Firewall |
| Emergency Flasher Relay (31) | Firewall |
| Dome Light | Speedo |
| Door Switch Driver’s Side | Speedo |
| Brake Warning Light | Speedo |
| Emergency Flasher Switch (31) | Firewall And Speedo |
Back in the Engine Compartment, there are a few more grounding tabs located on either side of the compartment on the flat area that the engine seal attaches to.
Well, I hope you are far less confused. For full wiring diagrams, which are not my property, see The Samba Type 1 Wiring Diagrams. These are the best diagrams I have found on the Internet so far.


Leave a Reply
You must be logged in to post a comment.