(The “Easy” Install Kit)
Okay, the time has come. The interior is shot and down-right manky. Holes everywhere, pieces of headliner crumbling off due to age, parts missing even?
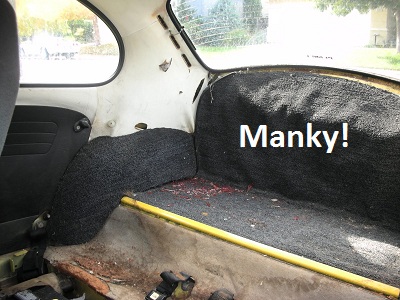
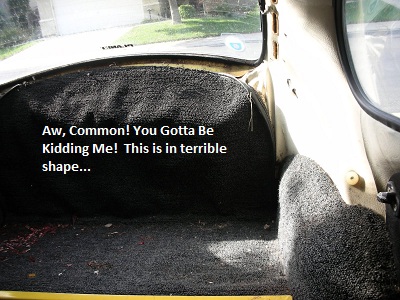
Yup, that’s two “before” shots of my back seat area. Just terrible, and I have to look at that through my rear view mirror.
This is the (my) most dreaded task on the car, it requires patience and acute attention to detail. Your hands are going to get sticky (and therefore dirty), your back will ache and your family might learn some new, unwelcome vocabulary. And this is the “easy install kit” even. Ready?
1. Preparing Yourself and The Car
Okay, right off the bat, this is going to take 4-8 hours pending your experience. It took me 6 1/2 hours and two headliner kits to get it, well, better then the pictures above. Let’s get our stuff together:
- Upholstery Glue – I used a can from JBugs (VW Headliner Glue, Code: Quart-Can, about $10) that came with my kit.
- Headliner Kit – This arrives in a long box.
- Sharp Scissors
- The 6 Headliner Bows – Pull these out of the old headliner.
- New Headliner Caps
- Utility Knife
- Heat Gun – Hair dryer will also work, it has to blow hot.
- 2″ Paint Brush
- A Helper
- A clean space – Large enough to lay out the main piece.
- Small Screwdriver
Now, lets prepare the car. This procedure is better done after the body has been painted, and the seats, carpet, side panels and windows (all windows but the door) are still out of the car. Yes, the Seats, Side Panels, Carpet and Windows (even the windshield) have to be removed before proceeding. You will also need to remove EVERYTHING that attaches through the headliner to the body. These include Seat Belts, Rear View Mirror, The Sun Visors, The Dome Light, The Rear Vent Plastic, The Rear Defog wires, and those white rubber seat back stops above the rear wheel wells. Whew…
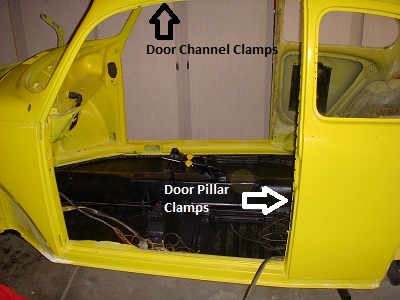
Done? Good, go ahead and clean all that up. See my other How To’s for the restoration of those items. Now tear out that old headliner. Easy “Big Cougar”, don’t go nuts; try to remove it in one piece. The Door Pillar sides are held in by many short clamps with very sharp teeth. You’ll have to peel back the Door Pillar piece and take your screw driver and pry these open; try not to break any off in the process. Where the Main Piece meets the doors are also longer clamps without sharp edges that require “widening” with your driver.
Remove the carcass from the cabin and locate the 5 or 6 (pending your year, I had 6) headliner bows. These are simply large gauge wire in two sizes; the smaller ones go to the front and the four longer ones go to the rear. Note the order you pulled them, for my memory might not serve me as well as I thought. Label them even, I did.
Take a digital camera and record where stuff went into the top bow, dome light area, rear vent, defog wires, and rear set rests. This will come in handy later.
2. Prepare The Headliner
Take the headliner out of it’s box and unfurl it on a clean flat surface. You might want to leave it out like this overnight until all of the pieces have flatted. The Door Pillar pieces are particularly difficult because of the way they were packaged – the hard rubber part never straightens out. We will take care of that in the channel with the sharp teeth later.
Once flat, fit the pieces into the cabin where they will go. Familiarize yourself with particular interest to the rear headliner wings that come down between the side and rear windows. Take note of how the Door Pillar pieces will fit at the bottom between the side panels and door pillar. Got it? Good, moving on…
3. Install The Headliner Padding
I splurged for the headliner padding kit from JBugs, and was disappointed in it’s quality. On future installs, I will make my own from carpet padding bought at a local hardware store.
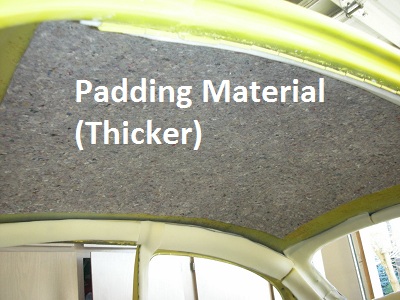

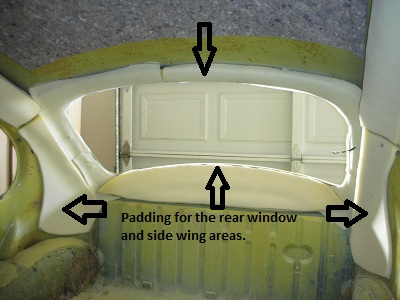
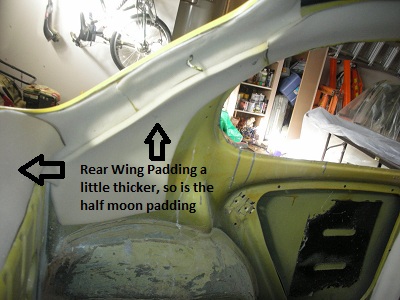
You will need thinner material for the rear wings and window, using thicker material for the ceiling and the half moon under the rear window.
I used 3M 80 Spray Glue to glue in the padding pieces. I also remember holding the ceiling piece in for a while until it set.
Leave a Reply
You must be logged in to post a comment.