4. Install The Door Pillar Pieces
Now, cover the entire back side of one door panel piece with glue using the 2 inch paint brush and let it set for 15 minutes. Do the same on the body where this piece will go, 15 minutes.
Come back and have that heat gun / hair dryer ready. Take your driver and insert the heavy plastic over the sharp toothed clamps along the door pillar. When doing this, pull the headliner material away from it’s intended area, you will see how that plastic is inserted. Pull the piece as high as it will go also, so there is no gap at the top of the door pillar.
Okay, not gently tap those clamps shut with your helper holding the glued piece towards the middle of the cabin. Go from the top to the bottom, not moving the piece. Now tightly pull the liner towards to back window, allowing it to adhere to the body.
Fun, right? Now take the heat gun and apply heat to the piece a little at a time to adjust wrinkles. Use the gun to make tight forms and stretch that liner like taffy. Heat, stretch, heat again, stretch; you get my drift? Work small areas and try not to get the headliner material too hot.
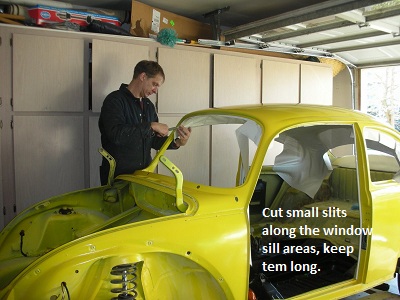
When you have come to areas with corners, you will need to cut out many slits to allow for a smooth fit. This is mainly done in the window and side panel areas. Make sure you leave enough room to roll the material up into the window channels. Good times, Good times…
Once satisfied, move on to the other side.
If you are looking at making this a two day project, you may stop here and continue to the next section tomorrow.
5. Install The Main Piece
Now that you have some experience with working with headliner material and heat guns, you can use it to apply the Main Piece. This large piece is perorated (as all will be from here on out), runs from the windshield all the way back to the rear window, with the rear wings cover a vast section in the back.
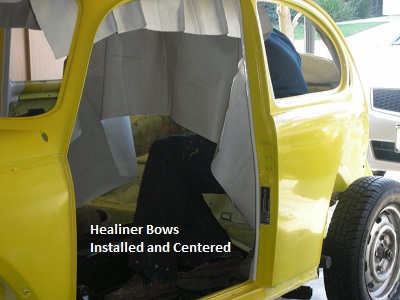
Flip the main piece over on a clean surface and look for the headliner bow channels. Cut the end off (like 1/2 inch) of each one of these channels with your scissors. As memory serves, the bows go through the channels, the two shorter ones in the front. Put on the bow caps (onto the end of the bows, duh?).
Now paint a liberal coat of glue to the parameter of the Main Piece and let that tack up for a few minutes. Bunch the whole thing up so the headliner bow rods are adjacent to each other and move into the car with the Main Piece. You’ll have to cock the bunch of rods crooked at first into the headliner bow channels on each side of the car. Once in, straighten the whole thing out so the headliner bow rods lie straight across from each other. Don’t worry about rod placement yet, just as long as they are all in there.
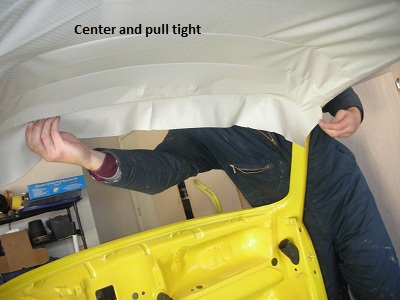
This is critical, center the whole piece so it is even on both sides, dead even. Once ensured you are all lined up, pull the front of the Main Piece out of the front of the windshield and press down against the frame. Don’t do the whole front, just tack down enough so the piece does not move around.
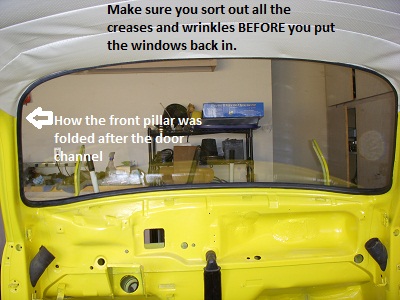
Locate the 3rd headliner bow rod. Pull it evenly so it about 3 inches past the door pillar. Pull firmly and feed the sides forward of that 3rd rod into the longer clamps at the top of the door channel. Once both sides are lined up and fed into the channels, tap them shut with a hammer. Work the piece around the Door Pillar pieces you installed previously. Make cuts and folds that look nice.
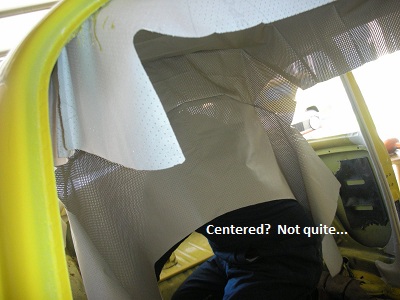
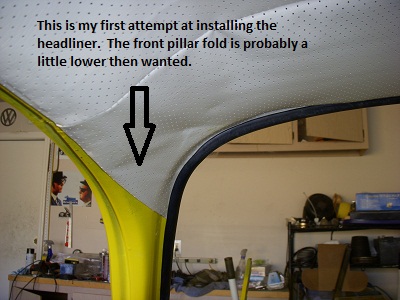
Now stretch the headliner towards the front door pillars, tacking it down in the corners where the sun visors attach. Centered still? If not, rework.
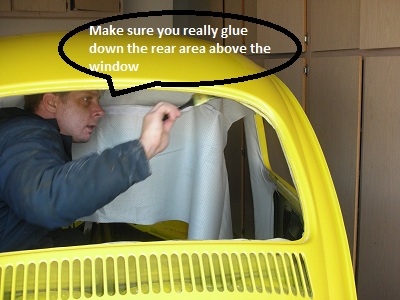
Moving to the rear of the car, stretch and attach the rear wings onto the contour of the edge of the rear window. Tack down also to the rear wheel well crease, pulling tightly. You don’t want to glue down the middle here, like mine, it looks bad. Heat, stretch, heat, stretch, again, again until you get it right. Take your time.

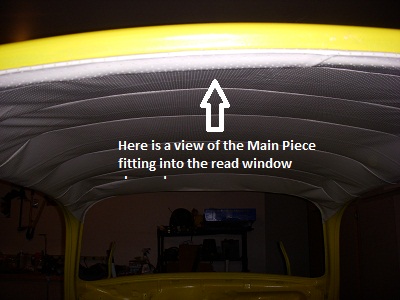
You’re going to have to cut the slits again, like mad, in this piece to get it around the window sills. Remember, cut these really long so you have a good bond between the body and the headliner. Move to the front of the car and work the windshield as you did the rear window.

Once satisfied, move on.
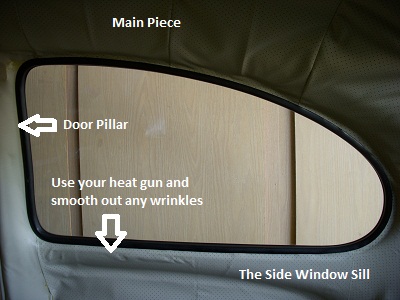
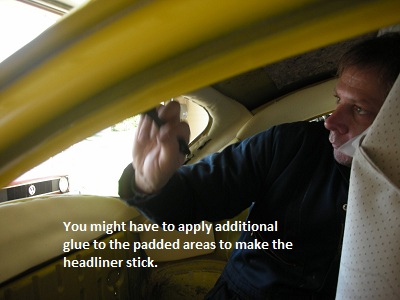
6. Install The Side Window Sills
The rest is a breeze. Apply a liberal coat of glue to the back on one of the Side Window Sill pieces and allow to tack for a few minutes. Glue them to the bottom of the side windows, about 2 inches away from the end of the door pillar. Center them up and apply heat to stretch and smooth them out. Leave plenty of material top and bottom. Cut the slits again into the window and side panel areas, leaving them long.
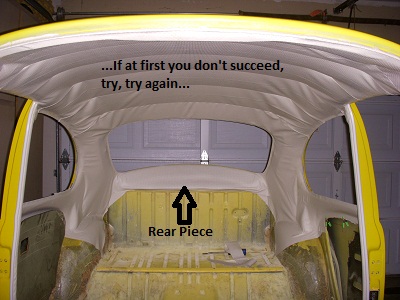
7. Install The Rear Piece
Okay, almost done. Take the Rear Piece and apply a liberal amount of glue, allowing it to tack. Install the piece high enough where the corner (round the half moon) overlaps both Main Piece wings already glued into the rear window pane in step #5. Press all that down, smooth it and heat it with the heat gun. Form and mold it in good and tight, especially around the bottom of the rear window sill. Cut the infamous slits into the top of the piece (leaving them long) and form around the rear window area. Tuck the bottom into the channel between the half moon and the rear firewall with your driver. Yes, carpet does go here later, but this is still a necessary piece to make it look proper.
8. Go Back Over The Job
Do you see areas you could have done better? Perhaps you need another headliner kit because you miffed the first one so bad, like me. They are about $75, so this is not a cheap mistake.
Go over the “rough” areas again with the heat gun. Try to smooth it out, take your time, and apply plenty of heat, that crease will work itself out eventually.
Now trim off you excess material and you’re done.
So we all had a jolly good time putting that in, right? Well, kick back, for better or worse, the headliner is installed…
Leave a Reply
You must be logged in to post a comment.